MAP Wellness

MAP Wellness
Spreading the Health

Saturday, February 25, 2012

Curried Quinoa Salad-dish

I am leaving on a trip down to Florida very soon, and so this past week I decided not to go crazy with my grocery shopping.  Instead, I tried to eat my way through the food I had on hand, in my fridge, freezer and pantry, as to not let anything go to waste once I head off to the sunny South!  This is how and why I came up with my new version of this classic curried grain dish.  A mix up of various goodies I always have in stock, that turned out to be one of THE best salads I have ever concocted!

Whatcha need:

- 1 C garbanzo beans (canned, reconstituted dried, or in my case, leftover frozen ones, defrosted!)
- 6 spears asparagus (I used frozen)
- 1/2 yellow onion, chopped
- 1/2 Tbsp coconut oil 
- 1/2 tsp., plus 1 Tbsp yellow curry powder
- 1 tsp. turmeric (Hello, yellow!)
- 1/2 tsp cumin
- 1/2 tsp. cinnamon
- 2 C cooked quinoa (I used a combo of red & white)
- 1/2 C raisins
- 1 green onion chopped
- 1/4 C raw cashews, chopped
- 1 Tbsp olive oil
- 1 Tbsp apple cider vinegar

Whatcha do:

1. Toss asparagus & onion in coconut oil, and spread on a cookie sheet.  Roast at 400 degrees until browned and caramelized, about 30 mins.
2. Meantime, in a small sauce pan, toss in garbanzo beans, 2 Tbsp. water and 1/2 tsp curry.  Bring to boil, covered.  Reduce heat and simmer until all liquid is evaporated, and beans begin to brown.  Stir in quinoa and remove from heat.
3. Once roast veggies are cooled, chop into bite sized pieces and add to quinoa mixture (I also added leftover roast sweet potato & mushrooms from dinner the night before!)
4. Stir in remaining spices, olive oil, raisins, green onion, cashews, and vinegar.  Adjust seasoning as desired, adding salt & pepper to taste.

So good, so filling, so packed full of body loving nutrients.  Careful though, this dear dish can stain your tupperware, but its robust flavour and pretty colour are well worth a few goldened containers I'd say!


Friday, February 24, 2012

Almond Cheesey Spread

Remember my post about coconut muffins (previous entry!)?  Well, my inspiration for creating those lovely morsels, was the simple fact that I required a vessel to drive my creamy delicious homemade almond spread to yummy-ville.  

I was creating this here almond cheese at the time, and sadly I must say that I much preferred the muffins sans spread, or smeared with a easy dollop of coconut oil over using this exact almond creation.  This creamy concoction is much too savory a treat, but pairs smashingly with crispy crackers or toast (I love it with Mary's gluten free crackers as shown in the above pic!)

Here's the SIMPLE recipe!

Whatcha need:
-  1 generous cup of raw almonds
-  1 tsp. apple cider vinegar
-  1 Tbsp lemon juice
-  1 Tbsp. nutritional yeast
-  salt & pepper to taste
 
What to Do:
1. Soak almonds in boiled water for 3-4 hours (until softened)
2. Remove the skins by pinching the almonds between your fingers.


5. In Vitamix (if you are lucky enough to own one!) or food processor, add the almonds, 1/3 c. water, apple cider vinegar, lemon juice, yeast and salt & pepper.
6. Blend until smooth. Add seasonings to taste!


You can add in other flavourings of your choice as well; maybe green onion, chives, or paprika for a more pungent flavour, or vanilla and your choice of sweetener for a more dessert like version (that would have been nicer on my muffins!).


Oh, and I must make a shout-out to my dear friend Sarah Kelsey for gifting me these adorable plates for my 31st birthday!  They are just so sweetly Canadian!  Love them, love you Sarah!!

Tuesday, February 14, 2012

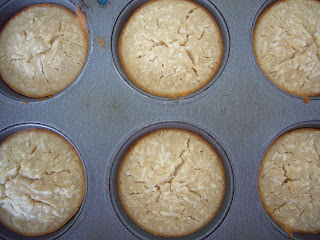
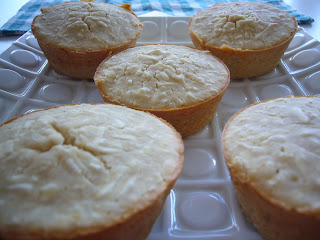
Delish Coconut Muffins


I was in my kitchen, whipping up a homemade batch of almond "cream cheese", when I had a thought.  I like slathering cream cheese on muffins.  Not bagels.  Muffins.  And I haven't had muffins in the house in a very long time.  Growing up, my mother almost always prepared a big batch on Saturday mornings, the freshly baked delights just ready when us kids awoke.  We would each enjoy one or more, topping the still warm treats with margarine or jam.  We were always sure to leave plenty left to power the family through the always rushed mornings of the following week.  Now, I admit that I possess not even half the "batter brilliance" of my mother, and have been known to state quite clearly, that 'I am a cook, not a baker".  But I thought I'd give it a go, flexing my non-existent electric-mixer-muscles, in the hopes of discovering  a long hidden talent...

But, since I am eating gluten free and vegan, this proved even more difficult than first imagined.  And, after a quick scan of my cupboards, it was clear I was in for an even greater challenge; I had brown rice flour in stock, and virtually nothing more!  No sugar, no other flours, no baking soda,  powder, or cornstarch. 

But I did have coconut milk, coconut shreds, and a mixer, plus a little dash of creativity!

Whatcha Need:
1 Cup coconut milk
1 1/2 cups soy milk
1 tbsp water (as needed - optional)
1 1/4 cups brown rice flour
2 cups coconut (shredded, sweetened) 
1 tsp salt
1 tbsp white sugar (for sprinkling - optional)

Preheat your oven to 375 degreesF (190 degrees C). Spray your muffin tin with cooking spray OR rub your muffin tin cups with organic coconut oil for some extra tropical yum (that's what I did!).


Mix together the  milks. Stir in the rice flour, shredded coconut, and salt. You may need to add more flour or water in order to get that classic muffin batter consistency (I am not a food scientist! Baking or not, I still eyeball things!).  Spoon the mixture into the prepared mini muffin cups, and sprinkle with sugar if desired.


Bake in the preheated oven until the tops are golden brown and crusty, about 30 minutes.


These were just what I wanted.  I really don't have much of a sweet tooth, but these puppies were just sweet and cake-like enough to satisfy my need for a treat.  Plus, they made a great vessel for my aforementioned "creamy cheese"!


Saturday, February 11, 2012

Junk in the Trunk (freezer) Curry (vegan/gluten free)

It was Friday night, and I wanted to make something super yummy and warm to eat.  It has been an unusually mild and dry winter in Toronto (where's the snow!?), but this night, the weather report was calling for flurries, flurries, and more flurries.  I wanted to hibernate, make a one pot meal, and then cozy up on the sofa with a tea and a movie. I didn't want to make the trek to the grocery store (although there is a 24 hour one right across the street!), so I decided to get creative and devise a meal using only what I had on hand.  And at the end of a long week of food adventuring in my kitchen, let me just say that my pantry ends up quit bare, and my produce drawers quite bleak.  So what to do, what to do...?

I knew I had some dried chickpeas in the cupboard, but with no time to soak them overnight, I had an "aha" moment, and tossed them into the slow cooker.  I had never prepared my garbanzo beans in this way prior, but the final product has me convinced that I will never go back to canned!  The peas came out delectably perfect; just al dente, keeping their shape, with a deep savor to their taste that I had never noticed in the sweet legume before.  And no icky can guck to rinse off either!  So here is how I did it:

Slow cooker chick peas (garbanzo beans!)  
Whatcha Need:
- 2 cups dried chick peas
- H2O

Simply place the peas in your crock pot, and cover with water by several inches.  Add a pinch of salt if you like.  Cook on High for 2-3 hours, or Low for 6.  Drain, rinse, and voila!

I decided that I wouldn't be needing the entire batch immediately, so I chose to freeze half.  Once dried, I spread the peas out in a single layer on a cookie sheet, and tossed the tray into the freezer.  Once fully solid, I transferred the ice cold little gems into a freezer bag for use later in the week!


Next, I had to decide what to do with my freshly reconstituted garbanzos, and opted to go the curry route, knowing I had a full can of coconut milk in the cupboard, and half a sweet potato in the fridge.  The rest of the ingredients are flex; use what you have!  I tend to buy veggies in bulk, and since I am usually cooking for one, I often blanch and freeze portions of broccoli, peppers, zucchini, you name it, for easy meals mid-week.  

 Chickpea 'N Junk Curry

Whatcha Need:
1 1/2 cup cooked chick peas
1 Tbsp coconut oil
1/2 sweet potato chopped
1/2 medium carrot sliced 
1 cup fresh sliced mushrooms
1 Tbsp yellow curry powder
1 1/2 tsp cinnamon
1/2 Tbsp dried onion flakes
1 tsp. each, cumin, tumeric & Indian masala mix
1 Tbsp veg broth
1/2 C cauliflower florets (freezer goods)
1/2 C sliced zucchini (freezer goods)
1/2 C chopped mixed peppers (freezer goods)
1 whole tomato, defrosted and chopped (freezer goods)
1/2 can coconut milk
1/2 Tbsp. agave nectar
1/4 C raisins
1 green onion diced (freezer goods)
Salt & pepper to taste

Preheat medium skillet on medium-high heat.  Add coconut oil, followed by sweet potato & carrot.  Cook, turning a few times until lightly browned, 6-7 mins.  Add in all the spices and dried onion, stirring until fragrant and toasted. Add mushrooms.  Mix in veggie broth, scraping up bits from the bottom of the pan.

Add in all the frozen veggies & the chickpeas.  Give it a good stir, and then pour in the coconut milk, agave, raisins, and salt & pepper.  Bring it to a simmer on Low heat, and cook until thickened to your liking.  Just before serving, toss in the green onion.  It will keep it's pretty colour.  :-)

Serve over brown rice, and top with avocado & fresh basil, mint or cilantro if you have 'em!  

Delish, cheap, easy, and fuss free!  Perfect for a quiet date night IN!